
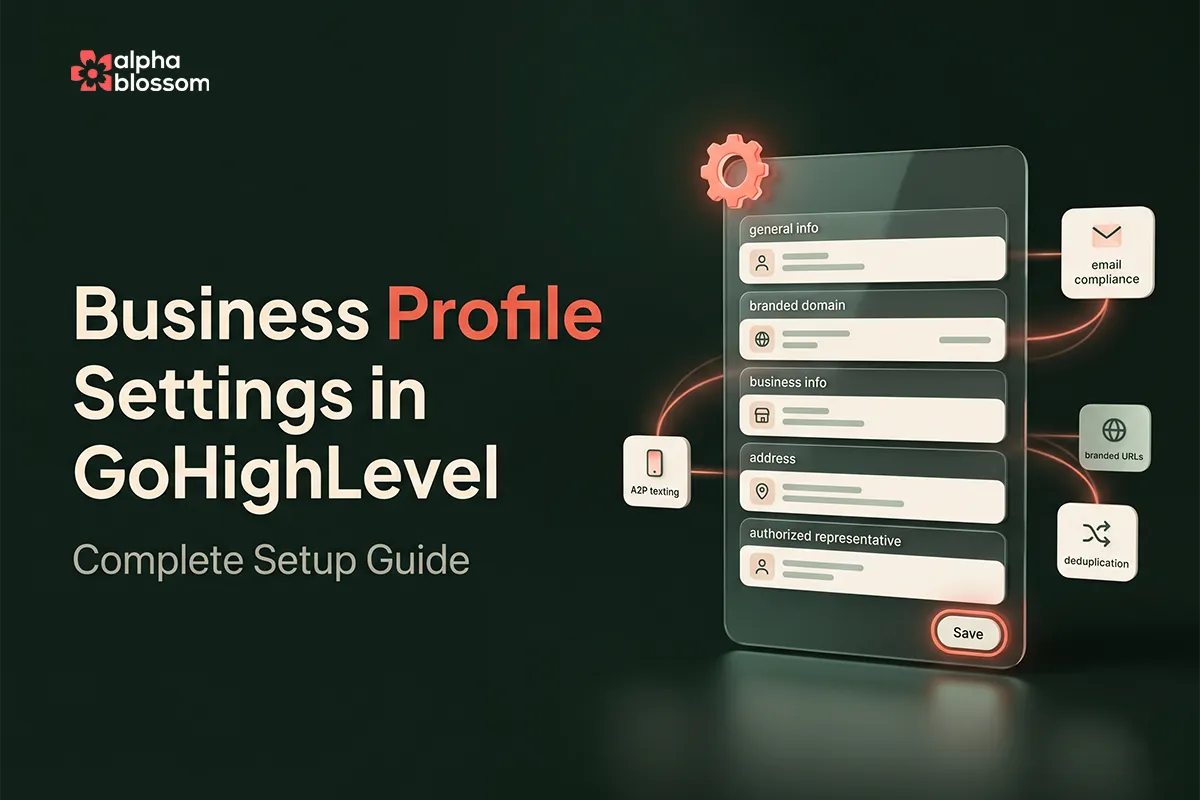
GoHighLevel Business Profile Settings: Setup Guide
If you just opened a new GoHighLevel account, the GoHighLevel Business Profile Settings screen is the first place you should go. Most users skip it. They click into the dashboard, start building funnels, set up automations, and forget that the settings panel even exists. Then, a few weeks later, they hit a wall trying to get A2P texting approved, or their branded links look unprofessional, or their emails fall out of compliance, and they realize the foundation was never set.
The whole thing takes about 5 minutes. There are five sections to fill out, each one controlling a specific part of how your account behaves: how your business is identified to telecom carriers, what domain shows on your shared links, who is on record as the authorized representative, how duplicate contacts are handled, and a handful of email and compliance defaults that quietly prevent a lot of headaches.
In this guide, I walk through every option in the Business Profile Settings panel and explain what each one does, when to enable it, and why it matters. Watch the video for the visual walkthrough or read below for the full reference. If you set this up correctly the first time, you never have to think about it again.
GoHighLevel Business Profile Settings: Setup Guide
The General Settings Section: Logo, Branded Domain, and Location ID
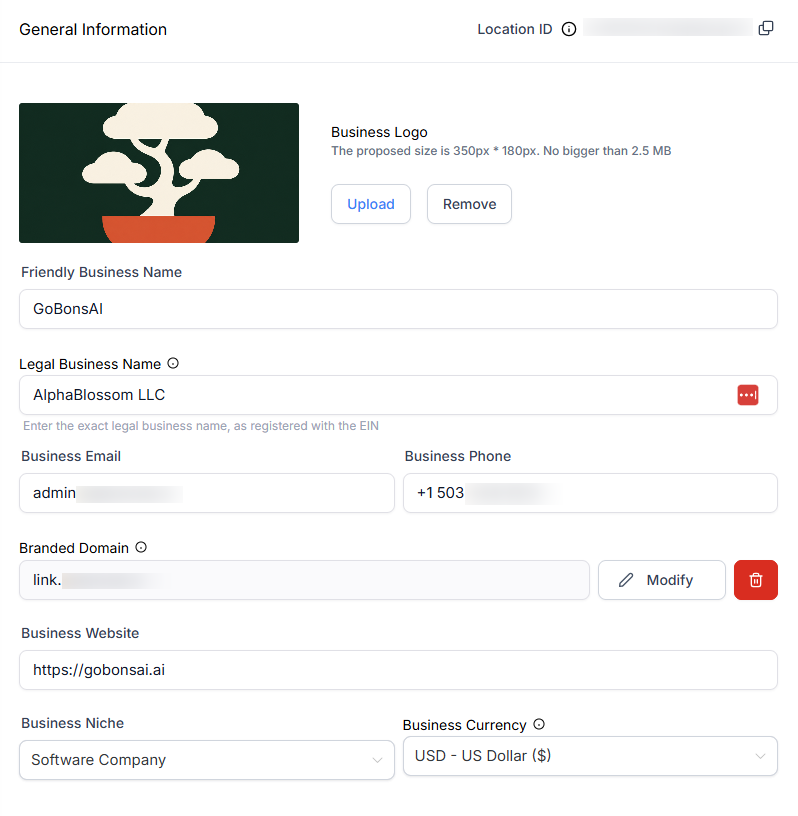
Business Friendly Name, Legal Name, Email, Phone, and Currency
Setting Up Your Branded Domain
Business Information and Why It Matters for A2P Texting
Business Physical Address, Time Zone, and Language
The General Preferences Most People Skip (and Should Not)
Merge Facebook Contacts and Facebook Lead Form Contacts
Disable Contact Time Zone (Leave This OFF)
Verify Email Address When First Email Is Sent
Default Unsubscribe Link in All Emails
Contact Deduplication Preferences
Why You Should Do This in the First Five Minutes of a New GoHighLevel Account
Watch "GoHighLevel Business Profile Settings: Every Option Explained" on Youtube
Where to Find Business Profile Settings in GoHighLevel
From your sub-account dashboard, click the Settings gear icon in the bottom-left corner. The first screen that loads is Business Profile. That is it. There is no hunting around for it. It is the very first thing in the settings menu, which tells you something about how GoHighLevel prioritizes it.
The Business Profile screen has five main sections, top to bottom: General Settings, Business Information, Business Physical Address, Authorized Representative, and General Information (the preferences block at the bottom). We will walk through each one.
The General Settings Section: Logo, Branded Domain, and Location ID
This is the top of the Business Profile page. It controls how your account is identified to your own customers and to support.
Business Friendly Name, Legal Name, Email, Phone, and Currency
The friendly name is what shows up internally and in shared links. The legal name is your registered business name (LLC, Inc, etc.) and it has to match what is on your business documents. The email here should be a real support or admin address you check, not a personal one. The phone number is the one your business uses publicly. The currency dropdown controls what your payment flows default to. If you are running a US-based business, US dollar is the choice.
Setting Up Your Branded Domain
This is one of the most overlooked settings and one of the most impactful. The branded domain is the URL that shows up when you share a direct link to a form, a calendar, or a payment link from your sub-account. Out of the box, the URL uses whatever the agency above you has configured (in our case it is link.alphablo.com), which looks fine but is not your brand.
You want a subdomain on your own root domain instead. For example, if your main website is gobonsai.ai, set your branded domain to link.gobonsai.ai. Subdomain is important because if you used the root domain directly, it would conflict with your website. The subdomain in front (link, share, go, etc.) gives you a clean separate URL space.
I always recommend hosting your domains on Cloudflare. Cloudflare is free, fast, and GoHighLevel has a direct integration so you do not have to log into your DNS host and add records manually. GoHighLevel also natively integrates with GoDaddy, Namecheap, and Ionos. When you click continue after entering your branded domain, GoHighLevel looks up where the domain is hosted and offers to automatically authorize the connection through the host's API. With Cloudflare it usually completes in 20 to 30 seconds. Worst case, DNS changes can take up to 48 hours, but in practice it is almost always under 15 minutes.
Uploading Your Logo
The logo appears in a few internal places and can show up on shared assets. GoHighLevel recommends 350 x 180 pixels and a maximum of 2.5 megabytes, but I usually use a square logo because it scales better across contexts. Use a PNG with a transparent background if you have one.
Business Information and Why It Matters for A2P Texting
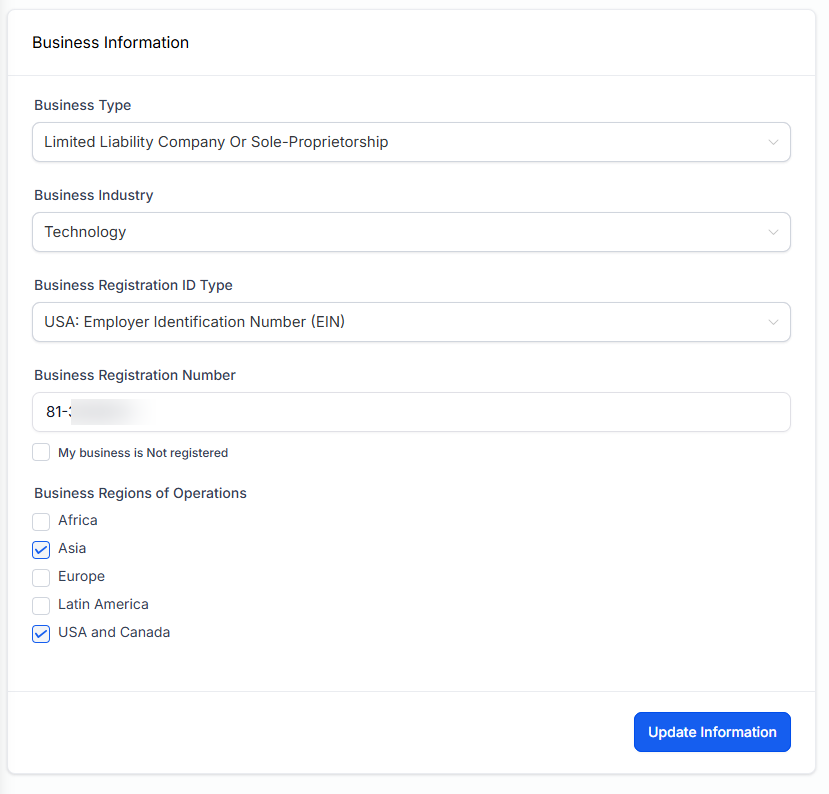
The Business Information section is where you enter the business type (LLC, Corp, sole proprietor, etc.), the industry, your business registration number, and which regions you operate in. For most US businesses, the registration number is your EIN (Employer Identification Number) issued by the IRS.
This is not just paperwork. When you later apply for A2P 10DLC certification (which is required to send SMS marketing or transactional texts at any meaningful volume in the US), GoHighLevel pulls the business information from this screen into the A2P application. If the EIN is missing or wrong, the application fails. If the business name does not match what the IRS has on file, the application fails. Setting this up correctly the first time saves you a frustrating back-and-forth with telecom approvals later.
Business Physical Address, Time Zone, and Language
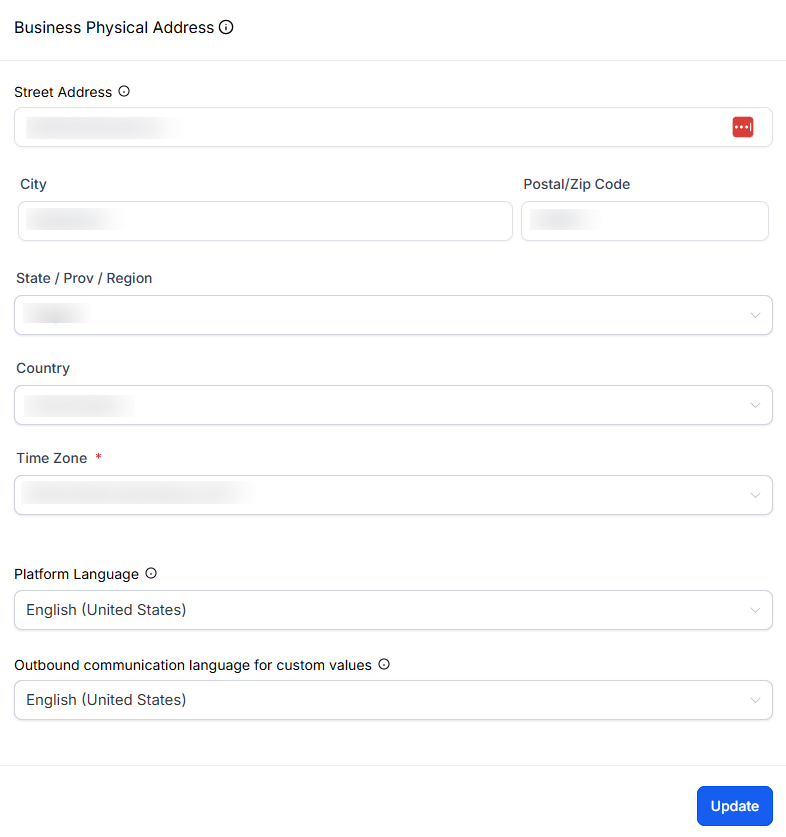
The address is your registered business address. Tax authorities and compliance review processes look at this, so make sure it is the real registered address, not a virtual mailbox unless that is actually your registered business address.
Time zone is a setting people get wrong all the time. Set this to where your business operates, not where your contacts live. GoHighLevel respects per-contact time zones for things like scheduled emails and appointment confirmations, so you do not need to fight the system by setting the account time zone to a contact's region.
The preferred language sets the platform default. The custom values language dropdown controls what language your merge tags default to. Right now the options are English and Spanish.
Authorized Representative
The authorized representative is the named individual on record for the account. This is used for legal and support reasons. Enter your legal name, your business email, your role (CEO, Founder, Manager, etc.), and your phone number with the country code. The phone number must include the country code (for example, +1 for US).
For most solo agency owners or founders, this is just you. For larger teams, it is the person legally responsible for the account. Get this right the first time, because changing the authorized representative later sometimes requires a support ticket.
The General Preferences Most People Skip (and Should Not)
This is the section at the bottom of the screen with the toggles. It looks innocuous and most users scroll past it. Each one of these toggles changes how your entire account behaves. Here is what matters.
Merge Facebook Contacts and Facebook Lead Form Contacts
If you are using Facebook Messenger conversations or running Facebook lead ads inside GoHighLevel, turn both of these on. They merge Facebook-sourced contacts with existing contacts in your CRM that have matching names. Without this, you will end up with two contact records for the same person, one from Facebook and one from however they originally entered your system. That makes reporting and follow-up automations much harder.
Disable Contact Time Zone (Leave This OFF)
Despite the name, this toggle forces your account's time zone onto all contacts. If you have it ON, a contact in Pacific time who schedules an appointment will see Eastern time slots if your business is in Eastern. That is a terrible booking experience. Leave this OFF. Let GoHighLevel use each contact's time zone for scheduling, confirmations, and reminders.
Bot Detection
This prevents bot clicks on email links from incrementing your statistics or accidentally triggering automations. If you are getting a lot of suspicious link clicks on outbound emails (often a sign of bot scanning), turn this on. For a brand new account or low email volume, you can leave it off and revisit later if your stats look suspicious.
Verify Email Address When First Email Is Sent
This one is worth the money. GoHighLevel charges $0.0025 per email verification (less than a third of a cent), and the first time you send to a new contact, it verifies that the email address is real before sending. This prevents you from blasting messages to typo'd addresses, fake sign-ups, and abandoned mailboxes, all of which hurt your sender reputation. Turn this ON.
Default Unsubscribe Link in All Emails
Turn this ON. This adds a default unsubscribe link to every outbound email automatically, which is required under CAN-SPAM and similar regulations. You can manually add unsubscribe links inside each email template, but it is easy to forget on a one-off email, and one missing unsubscribe can trigger spam complaints that hurt your deliverability or even get your sending account suspended. Let the default handle it. You can customize the unsubscribe text in the same section, just leave the unsubscribe merge tag in place.
Contact Deduplication Preferences
This controls how GoHighLevel decides if a new contact is actually a duplicate of an existing one. You can allow duplicates outright (do not do this unless you have a very specific reason), or you can choose to match on email first then phone, or phone first then email. I recommend email first for almost every use case. Email is the more reliable unique identifier for most B2B and online businesses. Match on email first, fall back to phone if the email field is empty.
Why You Should Do This in the First Five Minutes of a New GoHighLevel Account
Every single one of these settings touches something that comes back to bite you if it is wrong. A2P approvals depend on the business information. Email deliverability depends on the unsubscribe link and email verification. Sender reputation depends on bot detection and dedup rules. Branded URLs depend on the domain setup. Contact data quality depends on the dedup rules and the Facebook merge toggles. None of this is exciting, but all of it is foundational.
Open a new account, go to settings, fill in this one screen, save. Five minutes. You never have to look at it again. If you skip it and try to fix things later, you are debugging instead of building. We cover similar foundational setup steps in our guide to transferring sub-accounts cleanly between agencies, where the Business Profile is one of the first things the receiving agency wants to verify.


